前回につづき、さらにWPFでグリッド状の模様を描く方法について考えていく。
今回は、WindowsFormsHostを使ってWindowsFormsのユーザーコントロールをWPFアプリケーションに組み込む方法である。このやり方だとOnPaint()メソッドをオーバーライドし、Graphicsオブジェクトに対して描画していく・・・という昔ながらのコーディング手法が使える。
まずはユーザーコントロールのソースコードを示す。
このユーザーコントロール上でグリッド模様を描いて表示する。
using System;
using System.Collections.Generic;
using System.ComponentModel;
using System.Drawing;
using System.Data;
using System.Linq;
using System.Text;
using System.Windows.Forms;

namespace WpfWinFormHostLesson
{
    public partial class WinFormUserControl : UserControl
    {
        private const int GRID_SIZE = 20;

        public WinFormUserControl()
        {
            InitializeComponent();
            DoubleBuffered = true;
        }

        protected override void OnLoad(EventArgs e)
        {
            base.OnLoad(e);
            Invalidate();
        }

        protected override void OnResize(EventArgs e)
        {
            base.OnResize(e);
            Invalidate();
        }

        // グリッド模様の描画
        protected override void OnPaint(PaintEventArgs e)
        {
            base.OnPaint(e);
            e.Graphics.Clear(this.BackColor);

            for (int i = 0; i < this.ClientRectangle.Width; i += GRID_SIZE)
            {
                e.Graphics.DrawLine(Pens.Blue, i, 0, i, this.ClientRectangle.Height);
            }

            for (int i = 0; i < this.ClientRectangle.Height; i += GRID_SIZE)
            {
                e.Graphics.DrawLine(Pens.Blue, 0, i, this.ClientRectangle.Width, i);
            }
        }
    }
}
System.Windows.Forms.UserControlから継承した昔ながらのユーザーコントロールである。
20行目でDoubleBufferedプロパティにtrueをセットしている。こうしておかないと、激しく画面をリサイズさせたときにちらつきが目立ってしまう。
次に、メインのxamlを示す。
<Window xmlns:my="clr-namespace:System.Windows.Forms.Integration;assembly=WindowsFormsIntegration"  x:Class="WpfWinFormHostLesson.MainWindow"
        xmlns="http://schemas.microsoft.com/winfx/2006/xaml/presentation"
        xmlns:x="http://schemas.microsoft.com/winfx/2006/xaml"
        xmlns:local="clr-namespace:WpfWinFormHostLesson"
        Title="MainWindow" Height="350" Width="525">
    <Grid>
        <my:WindowsFormsHost Name="winFormsHost">
            <my:WindowsFormsHost.Child>
                <local:WinFormUserControl x:Name="userControl" />
            </my:WindowsFormsHost.Child>
        </my:WindowsFormsHost>
    </Grid>
</Window>
VisualStudioのxamlエディタに、ツールボックスからWindowsFormsHostをドラッグ&ドロップすると自動的にxamlの一行目に
xmlns:my="clr-namespace:System.Windows.Forms.Integration;assembly=WindowsFormsIntegration"
の宣言が挿入される。
ユーザーコントロールをxamlで配置するため、4行目に
xmlns:local="clr-namespace:WpfWinFormHostLesson"
の宣言を追記した。
そして、9行目で
<local:WinFormUserControl x:Name="userControl" /%gt;
のようにして、先ほどのユーザーコントロールを配置している。
プログラムを実行すると以下のように表示される。
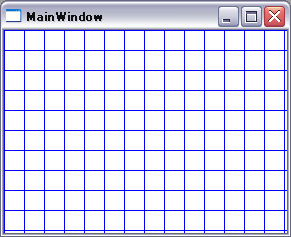
この方法では、素早く画面をリサイズさせた場合でも表示の乱れは無かった。
時代の流れに逆行するようではあるが、WindowsFormHostを使うのも時には有効な手段であると思う。
追記:
ただし、WindowsFormsHostの表示の上にWPFの描画エレメントを重ねて表示させたりすることはできないようだ。
この点は、やや柔軟性に欠けている。
ピンバック: 【WPF】グリッド状の模様を描く (1)~(6)のまとめ – ザワプロ!