Androidでの操作はタッチパネルが基本となる。
入力手段が限られているため、少ないタッチ操作で様々なアクションが行えると便利である。
今回はViewのonTouch()メソッドを使って以下の4つのアクションを振り分けることを考えてみる。
なお、各アクションの名称は一般的なものと言うよりは記事内で適当につけた便宜的なものである。
- タップ
- ダブルタップ
- ムーブ
- ホールド
画面を1回、軽く叩くような操作
画面を2回、軽く叩くような操作
画面に指を置き、そのまま画面上を移動する操作
画面に指を置いたままにしておく操作
以上の操作をViewのonTouchイベントで振り分けたい。
このロジックはやや複雑になったため、一つのクラスにまとめることにした。
以下にそのソースコードを示す。
package com.lesson.touch;

import android.view.MotionEvent;

import com.lesson.touch.Waiter.OnWaitCompletedListener;

class TouchEventDispatcher{
	interface TouchEventDispatcherListener{
		void onTap(float x, float y);
		void onDoubleTap(float x, float y);
		void onMove(float initX, float initY, float x, float y);
		void onHold(float x, float y);
	}

	private static final int DOUBLE_TAP_WAIT_MILLI_SECOND = 500;
	private static final double MOVE_DISTANCE = 20;

	private TouchEventDispatcherListener listener;
	public void setTouchEventDispatcherListener(TouchEventDispatcherListener listener){
		this.listener = listener;
	}

	private boolean holdExecuted = false;
	private float initX;
	private float initY;
	private int actionUpCount = 0;

	private final Waiter waiter = new Waiter(DOUBLE_TAP_WAIT_MILLI_SECOND);

	// 初期化
	{
		waiter.setOnWaitCompletedListener(new OnWaitCompletedListener() {

			@Override
			public void onWaitCompleted() {

				if( 0 < actionUpCount ){
					// シングルタップ実行
					listener.onTap(initX, initY);
				}
				else
				{
					// ホールド実行
					listener.onHold(initX, initY);
					holdExecuted = true;
				}
			}
		});
	}

	/**
	 * @param event
	 */
	public void onTouchEvent(MotionEvent event) {

		if(event.getAction()==MotionEvent.ACTION_DOWN){

			holdExecuted = false;

			if(!waiter.isWaiting()){

				initX = event.getX();
				initY = event.getY();
				actionUpCount = 0;

				waiter.start();
			}
	    }
	    else if(event.getAction()==MotionEvent.ACTION_MOVE){

	    	if( !holdExecuted ){
	        	double distance = Math.sqrt(
	        			Math.pow(event.getX() - initX, 2) + Math.pow(event.getY() - initY, 2));

	        	if( waiter.isWaiting() && MOVE_DISTANCE < distance ){
	        		waiter.cancel();
	        	}

	        	if( !waiter.isWaiting() && listener != null){
	        		// ムーブイベント起動
	        		listener.onMove(initX, initY, event.getX(), event.getY());
	        	}
	    	}
	    }
	    else if(event.getAction()==MotionEvent.ACTION_UP){

	    	if( waiter.isWaiting() && 1 < ++actionUpCount ){
	    		waiter.cancel();

	    		if( listener != null){
	    			// ダブルタップ実行
	    			listener.onDoubleTap(event.getX(), event.getY());
	    		}
	    	}
	    }
	}
}
29行目で宣言しているWaiterというクラスは一定時間後にUIスレッド上で任意の処理を実行させるためのクラスで、
ここではキャンセルされなければ500ミリ秒後に以下の処理を行うようにしている。
- 一定時間経過後、タップ回数が1回以上のとき
- 一定時間経過後、タップ回数が0回のとき
・タップイベントを発行する。
・ホールド実行フラグをtrueにする。
・ホールドイベントを発行する。
ここでホールド実行フラグを立てる必要があるのは、ホールドイベント発行後にムーブイベントが発生するのを防ぐためである。
なお、Waiterのソースコードは後で示すことにする。
処理の要となるのは55行目からのonTouchEvent()メソッドである。
このメソッドはViewのonTouchEventメソッドから呼ばれることを想定している。
タッチアクションに対応して行う処理を簡単に書き出すと、以下のようになる。
- MotionEvent.ACTION_DOWN時
- MotionEvent.ACTION_MOVE時
- MotionEvent.ACTION_UP時
・ホールド実行フラグをfalseにする
・Waiterが待ち状態でなければWaiterの待ちをスタートする
・ホールド実行中で無い時に次の処理に進む
・Waiterが待ち状態、かつ移動距離が一定の値を超えたらWaiterの待ち状態をキャンセルし、次の処理に進む。
・ムーブイベントを発行する。
・タップ回数をカウントアップする。
・Waiterが待ち状態、かつ2度目にACTION_UPが起こったときはWaiterの待ち状態をキャンセルし、次の処理に進む。
・ダブルタップイベントを発行する。
以上で各アクションは振り分けられるはずである。
次にWaiterのソースコードを示す。
package com.lesson.touch;

import android.os.Handler;


class Waiter{
	public interface OnWaitCompletedListener{
		void onWaitCompleted();
	}

	private OnWaitCompletedListener listener;
	public void setOnWaitCompletedListener(OnWaitCompletedListener listener){
		this.listener = listener;
	}

	private final int waitMilliSeconds;
	private final Handler handler = new Handler();
	private final Runnable runnable = new Runnable() {

		@Override
		public void run() {
			waiting = false;
			if( listener != null ){
				listener.onWaitCompleted();
			}
		}
	};

	private boolean waiting = false;

	/**
	 * @param waitMilliSeconds
	 */
	public Waiter(int waitMilliSeconds){
		this.waitMilliSeconds = waitMilliSeconds;
	}

	/**
	 * Waitスタート
	 */
	public void start(){
		waiting = true;
		handler.postDelayed(runnable, waitMilliSeconds);
	}

	/**
	 * Waitキャンセル
	 */
	public void cancel(){
		if( waiting ){
			waiting = false;
			handler.removeCallbacks(runnable);
		}
	}

	/**
	 * Wait中かどうか
	 * @return
	 */
	public boolean isWaiting(){
		return waiting;
	}
}
android.os.HandlerのpostDelayed()を使い、任意の処理を遅らせて実行させている。
時間が来る前に処理をキャンセルすることもできる。
最後にレイアウトxmlとメインのActivityを示す。
<?xml version="1.0" encoding="utf-8"?>
<LinearLayout xmlns:android="http://schemas.android.com/apk/res/android"
    android:orientation="vertical"
    android:layout_width="fill_parent"
    android:layout_height="fill_parent"
    >
<TextView
	android:id="@+id/info"
    android:layout_width="fill_parent"
    android:layout_height="wrap_content"
    android:text=""
    />
</LinearLayout>
package com.lesson.touch;

import android.app.Activity;
import android.os.Bundle;
import android.view.MotionEvent;
import android.widget.TextView;

public class MainActivity extends Activity {
    /** Called when the activity is first created. */
    @Override
    public void onCreate(Bundle savedInstanceState) {
        super.onCreate(savedInstanceState);
        setContentView(R.layout.main);

        final TextView info = (TextView)findViewById(R.id.info);

        touchEventDispatcher.setTouchEventDispatcherListener(new TouchEventDispatcher.TouchEventDispatcherListener() {

			@Override
			public void onTap(float x, float y) {
				info.setText("onTap x:" + x + " y:" + y);
			}

			@Override
			public void onMove(float initX, float initY, float x, float y) {
				info.setText("onMove x:" + x + " y:" + y);
			}

			@Override
			public void onHold(float x, float y) {
				info.setText("onHold x:" + x + " y:" + y);
			}

			@Override
			public void onDoubleTap(float x, float y) {
				info.setText("onDoubleTap x:" + x + " y:" + y);
			}
		});
    }


    private final TouchEventDispatcher touchEventDispatcher = new TouchEventDispatcher();

    @Override
    public boolean onTouchEvent(MotionEvent event) {

    	touchEventDispatcher.onTouchEvent(event);
    	return true;
    }
}
プログラムを実行すると以下のようになるだろう。
・タップ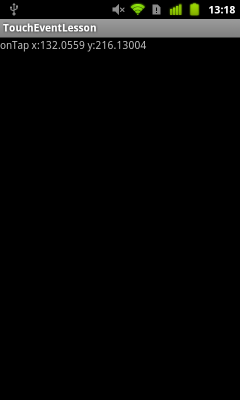
|
・ダブルタップ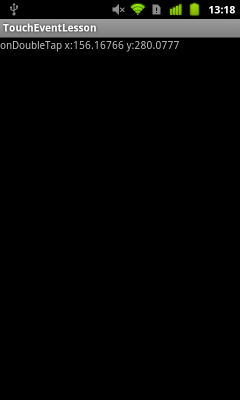
|
・ホールド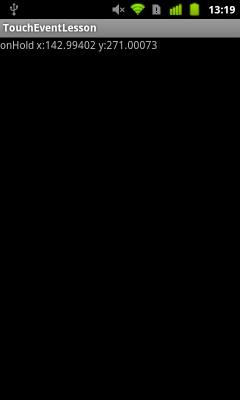
|
・ムーブ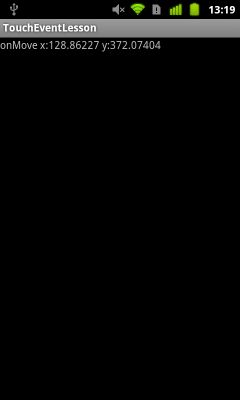
|
なお、今回のプログラムではマルチタッチの想定はしていない。