前回作成したアンドゥ・リドゥ機能をAndroidのアプリに組み込んでみよう。
簡単なドローアプリを作ってみることにする。
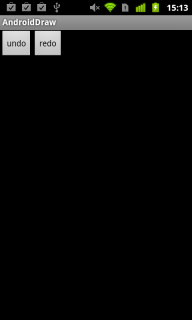
画面は以下のような構成とする。
|
|
UndoとRedoの二つのボタンがある。背景全体はカスタムビューとなっていて、タッチ&ムーブで
絵を書くことが出来る。
まずはレイアウトのxmlを示す。
<?xml version="1.0" encoding="utf-8"?>
<RelativeLayout xmlns:android="http://schemas.android.com/apk/res/android"
    android:orientation="vertical"
    android:layout_width="fill_parent"
    android:layout_height="fill_parent"
    >
<com.lesson.DrawingView
    android:id="@+id/drawingView"
    android:layout_width="fill_parent"
    android:layout_height="fill_parent"
    />
<Button
    android:id="@+id/btnUndo"
    android:layout_width="wrap_content"
    android:layout_height="wrap_content"
    android:text="undo"
    />
<Button
    android:id="@+id/btnRedo"
    android:layout_width="wrap_content"
    android:layout_height="wrap_content"
    android:layout_toRightOf="@id/btnUndo"
    android:text="redo"
    />
</RelativeLayout>
そして、メインのActivityは次のようなコードとなる。
MainActivity.java
package com.lesson;

import com.lesson.R;

import android.app.Activity;
import android.os.Bundle;
import android.view.View;
import android.view.View.OnClickListener;

public class MainActivity extends Activity {

    /** Called when the activity is first created. */
    @Override
    public void onCreate(Bundle savedInstanceState) {
        super.onCreate(savedInstanceState);
        setContentView(R.layout.main);

        final DrawingView view = (DrawingView)findViewById(R.id.drawingView);

        findViewById(R.id.btnUndo).setOnClickListener(new OnClickListener() {

            @Override
            public void onClick(View v) {
                view.undo();
            }
        });

        findViewById(R.id.btnRedo).setOnClickListener(new OnClickListener() {

            @Override
            public void onClick(View v) {
                view.redo();
            }
        });
    }
}
最後に、このアプリの要となるカスタムビューのソースを示す。
DrawingView.java
package com.lesson;

import java.util.ArrayList;

import android.content.Context;
import android.graphics.Canvas;
import android.graphics.Color;
import android.graphics.Paint;
import android.graphics.PointF;
import android.util.AttributeSet;
import android.view.MotionEvent;
import android.view.View;

public class DrawingView extends View {

    private final HistoryStack<ArrayList<PointF>> history = new HistoryStack<ArrayList<PointF>>();
    private ArrayList<PointF> currentStroke;

    public DrawingView(Context context, AttributeSet attrs) {
        super(context, attrs);
        // TODO Auto-generated constructor stub
    }

    /**
     * アンドゥ
     */
    public void undo(){
        history.undo();
        invalidate();
    }

    /**
     * リドゥ
     */
    public void redo(){
        history.redo();
        invalidate();
    }

    @Override
    public boolean onTouchEvent(MotionEvent event) {
        if( event.getAction() == MotionEvent.ACTION_DOWN){
            // 新しい描画
            currentStroke = new ArrayList<PointF>();
            return true;
        }
        else if(event.getAction() == MotionEvent.ACTION_MOVE){
            currentStroke.add(new PointF(event.getX(),event.getY()));
            invalidate();
            return true;
        }
        else if(event.getAction()==MotionEvent.ACTION_UP){
            history.add(currentStroke);
            currentStroke = null;
            invalidate();

            return true;
        }

        return super.onTouchEvent(event);
    }

    /**
     * PointFの配列を元に一連の線を描画する
     * @param canvas
     * @param paint
     * @param stroke
     */
    private void drawStroke(Canvas canvas,Paint paint,ArrayList<PointF> stroke){
        PointF startPoint = null;
        for(PointF pf:stroke){
            if( startPoint != null){
                canvas.drawLine(startPoint.x, startPoint.y, pf.x, pf.y, paint);
            }

            startPoint = pf;
        }
    }

    private final Paint paint = new Paint();

    {
        paint.setColor(Color.CYAN);
        paint.setStrokeWidth(1.f);
    }


    @Override
    protected void onDraw(Canvas canvas) {

        // 履歴に入っている線を描画する
        for(final ArrayList<PointF> stroke:history.iterateUndo()){
            drawStroke(canvas,paint,stroke);
        }

        // 現在描画中の線を描画する
        if( currentStroke != null){
            drawStroke(canvas,paint,currentStroke );
        }
    }
}
17行目で宣言している履歴を格納するためのHistoryStackというクラスのソースは前回の記事に示した通りである。
onDrawのタイミングで、履歴にある全てのストロークと描画中のストロークを表示している。
画面のUndoボタンが押されると履歴を一つ戻し、Redoボタンが押されると履歴を一つ進めるようにしている。
1.初期状態
|
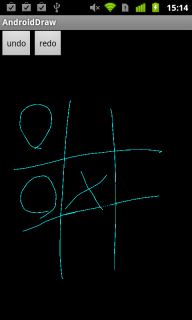
2.アンドゥ
|
3.アンドゥ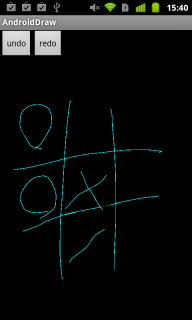
|
4.アンドゥ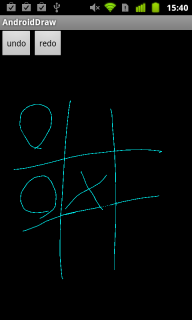
|
5.書き込み
|
このようにして、アンドゥ・リドゥ機能を実現することができた。
ただ、このアプリのアンドゥ・リドゥ機能の回数は無制限である。
廉価版アプリなどで回数制限をかけたいときは、
もう少しコーディングを工夫する必要がありそうだ。