Viewを配置するにはレイアウトxmlを記述するか、コードで記述するかのどちらかとなる。
通常の場合はレイアウトxmlを記述したほうがコーディングの効率はいいと思うが、
カスタムView内で子Viewを規則的に配置したい場合などではコードを書いた方が効率的なこともありうる。
そこで、こちらの方法も知っておくと便利である。
xmlの「android:layout_…」に相当するのはLayoutParamsというクラスで、
このクラスのインスタンスに対して各種の値を設定し、setLayoutParams()メソッドで
対象のViewにセットすればよい。
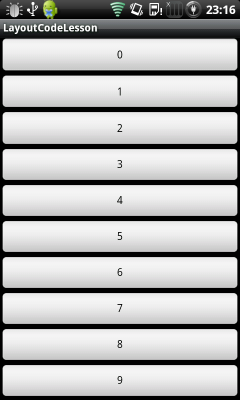
サンプルコードは10個のボタンを規則的に並べただけのカスタムViewである。
一応、リスナーを定義してあって、イベントでどの数字が押されたかを知ることができるようになっている。
NumberButtonView.java
public class NumberButtonView extends LinearLayout {

	public interface OnNumberPushedListener{
		public void onNumberPushed(int num);
	}

	private OnNumberPushedListener listener;

	public void setOnNumberPushedListener(OnNumberPushedListener listener){
		this.listener = listener;
	}

	public NumberButtonView(Context context, AttributeSet attrs) {
		super(context, attrs);

		// ボタンに登録するリスナー
		final OnClickListener clicked = new OnClickListener(){

			@Override
			public void onClick(View v) {
				if(listener!=null){
					listener.onNumberPushed((Integer)v.getTag());
				}
			}
		};


		// android:orientation="vertical" に相当
		setOrientation(VERTICAL);

		/*
			android:layout_width="fill_parent"
		    android:layout_height="wrap_content"
		    android:layout_weight="1"
		    に相当するパラメータを作成
		*/
		final LayoutParams params = new LayoutParams(LayoutParams.FILL_PARENT, LayoutParams.WRAP_CONTENT);
		params.weight = 1.f;

		for( int i=0; i<10; i++ ){
			final Button b = new Button(context);

			b.setText(Integer.toString(i));
			b.setTag(i);
			b.setLayoutParams(params);
			b.setOnClickListener(clicked);

			addView(b);
		}
	}
}
MainActivity.java
public class MainActivity extends Activity {
    /** Called when the activity is first created. */
    @Override
    public void onCreate(Bundle savedInstanceState) {
        super.onCreate(savedInstanceState);
        setContentView(R.layout.main);

        ((NumberButtonView)findViewById(R.id.numberButtonView)).setOnNumberPushedListener(new OnNumberPushedListener() {

			@Override
			public void onNumberPushed(int num) {

				Toast.makeText(MainActivity.this, num + " pushed.", Toast.LENGTH_SHORT).show();
			}
		});
    }
}
main.xml
<?xml version="1.0" encoding="utf-8"?>
<LinearLayout xmlns:android="http://schemas.android.com/apk/res/android"
    android:orientation="vertical"
    android:layout_width="fill_parent"
    android:layout_height="fill_parent"
    >
<com.lesson.layoutcode.NumberButtonView
	android:id="@+id/numberButtonView"
    android:layout_width="fill_parent"
    android:layout_height="fill_parent"
    />
</LinearLayout>
実行結果は以下のようになる。
android:minHeightや
android:maxHeight
に相当するのは なになんでしょうか?
返信お待ちしております。