ListViewはリスト状に項目を表示できるViewである。
今回はListViewの基本的な使い方を見ていくことにする。
まず、サンプルアプリの画面の配置は以下のようにした。
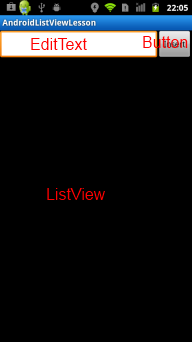
上にあるEditTextに何か文字を入力してボタンを押すと、ListViewに次々と追加されていくようにする。
この画面にxmlは以下のようになる。
<?xml version="1.0" encoding="utf-8"?>
<LinearLayout xmlns:android="http://schemas.android.com/apk/res/android"
    android:layout_width="fill_parent"
    android:layout_height="fill_parent"
    android:orientation="vertical" >

    <LinearLayout
        android:layout_width="fill_parent"
        android:layout_height="wrap_content"
        android:orientation="horizontal"
        >
        <EditText
            android:id="@+id/txtName"
            android:layout_height="fill_parent"
            android:layout_width="0dp"
            android:layout_weight="1"
            android:inputType="text"
            />
        <Button
            android:id="@+id/btnInsert"
            android:layout_width="wrap_content"
            android:layout_height="fill_parent"
            android:text="Insert"
            />
    </LinearLayout>
    <ListView
        android:id="@+id/listView"
        android:layout_width="fill_parent"
        android:layout_height="0dp"
        android:layout_weight="1"/>

</LinearLayout>
次にActivityのプログラムを示す。
package com.lesson.lilstview;

import java.util.ArrayList;
import java.util.List;

import android.app.Activity;
import android.os.Bundle;
import android.view.View;
import android.view.View.OnClickListener;
import android.widget.ArrayAdapter;
import android.widget.ListView;
import android.widget.TextView;

public class AndroidListViewLessonActivity extends Activity {

	private ArrayAdapter<String> adapter;
	private List<String> list = new ArrayList<String>();

    /** Called when the activity is first created. */
    @Override
    public void onCreate(Bundle savedInstanceState) {
        super.onCreate(savedInstanceState);
        setContentView(R.layout.main);

        adapter = new ArrayAdapter<String>(this, android.R.layout.simple_list_item_1, list);
        ((ListView)findViewById(R.id.listView)).setAdapter(adapter);

        findViewById(R.id.btnInsert).setOnClickListener(new OnClickListener() {

        	private final TextView textView = (TextView)findViewById(R.id.txtName);

			@Override
			public void onClick(View v) {
				list.add(textView.getText().toString());
				adapter.notifyDataSetChanged();
			}
		});
    }
}
ListViewと、その中のデータを関連付けるためにArrayAdapterというクラスを使っている。
16行目でArrayAdapterの参照をメンバ変数として持っておく。
17行目で生成しているString型のArrayListがListViewのデータとなる。
ListAdapterのインスタンスは25行目のonCreate()メソッド内で生成している。
いくつかあるコンストラクタのうち、このサンプルでは引数が
ArrayAdapter(Context context, int textViewResourceId, List<T> objects)
となっているものを使っている。
2番目の引数で指定しているリソースID
「android.R.layout.simple_list_item_1」
はAndroidに標準で含まれているリソースである。
ソースを引用すると以下のような内容となっているようだ。
<?xml version="1.0" encoding="utf-8"?>
<!-- Copyright (C) 2006 The Android Open Source Project

     Licensed under the Apache License, Version 2.0 (the "License");
     you may not use this file except in compliance with the License.
     You may obtain a copy of the License at

          http://www.apache.org/licenses/LICENSE-2.0

     Unless required by applicable law or agreed to in writing, software
     distributed under the License is distributed on an "AS IS" BASIS,
     WITHOUT WARRANTIES OR CONDITIONS OF ANY KIND, either express or implied.
     See the License for the specific language governing permissions and
     limitations under the License.
-->

<TextView xmlns:android="http://schemas.android.com/apk/res/android"
    android:id="@android:id/text1"
    android:layout_width="match_parent"
    android:layout_height="wrap_content"
    android:textAppearance="?android:attr/textAppearanceLarge"
    android:gravity="center_vertical"
    android:paddingLeft="6dip"
    android:minHeight="?android:attr/listPreferredItemHeight"
/>
この内容によれば名前のとおりシンプルなTextViewが一つ定義されているだけである。
これがListViewの1項目に相当するようになる。
33行目からがボタンが押されたときの処理となる。
まず34行目で、TextViewの内容をリストに追加している。
注意が必要なのは、ListViewのデータ元となるリストに変更を加えただけでは
表示に反映されないことである。
次の行で、ListView側にデータ元の内容が変更されたことを通知するため、
ArrayAdapterのnotifyDataSetChanged()メソッドを呼んでいる。
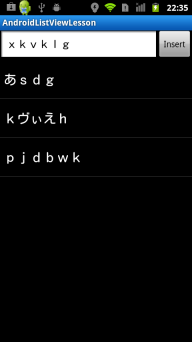
アプリを実行すると、以下のようになる。